|
Hello and welcome back!!
For this blog post, I have no photo because it was accidentally throw away in the trash over Wednesday when we were out on holiday. The vase that my group picked together as a team was the hydria. This type of vase comes from Ancient Greece and was used for mainly water carrying during that period of time. Our vase was crafted out from the Snow White fairy tale from having the well with Snow White in the beginning, evil queen giving Snow White the poisoned apple as the dwarfs run on, and finally, the final scene with Snow White waking up with the Prince by her side. All this pieces are divided by red apples that we glued red paper to. The entire vase was black with white from a white gel pen and I mainly worked on highlighting the entire vase, itself, with the pen and drawing out the picture. I also present to the class with other girl the invisible piece of paper and explained it. In this short project, I learned the definition of Sgraffito is the Italian word for scratch and Registers mean the horizontal lines divided to tell a story. For example, how our vase is divided up and arranged in certain way into three parts to tell the fairy tale of Snow White from beginning to middle to the end. Thank you for reading and hoped you enjoyed!
0 Comments
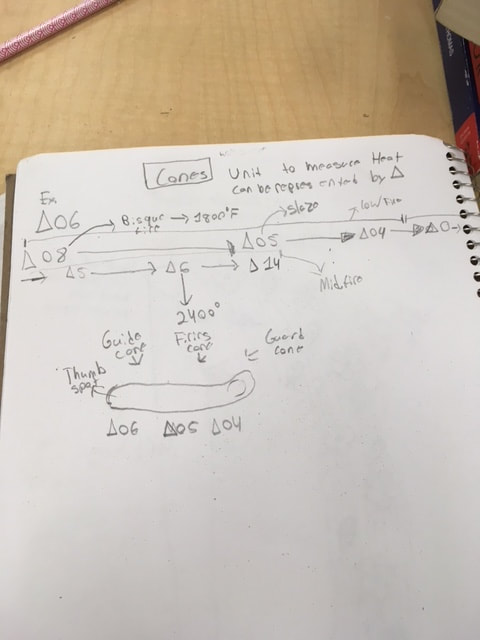
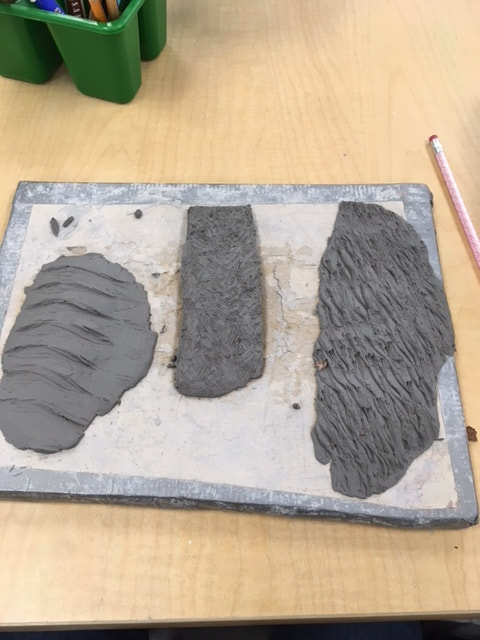
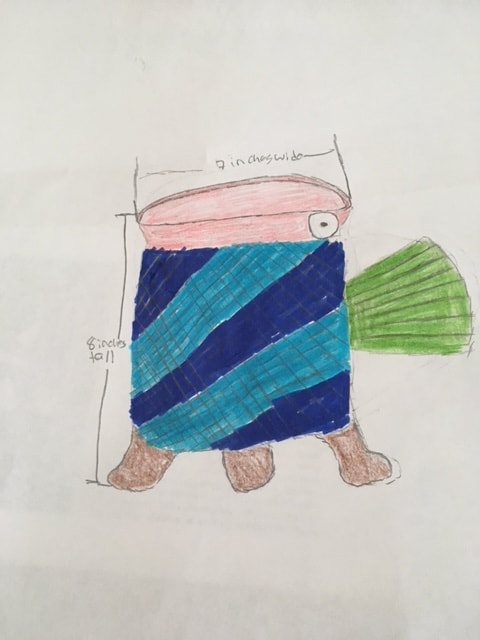
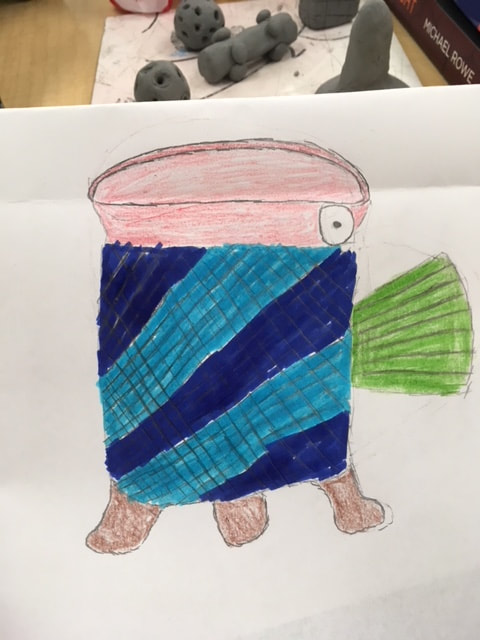
Hi and welcome back! Today, I am going to talk about the tripod cup that I been going on for a couple of week now. It started off with just the drawing of my idea, which is a fish design of a tripod with eyes at the side, fins, and scales. I struck pretty close to my idea, only changing by adding a tail and one more fin. Next, we started watching video of how to shape it properly by simply bending the bottom into a triangle until they meet and closing off the remaining pieces. We also practiced with clay stamps, viewing designs and what might work best with our tripod before finally creating our clay stamps. I created five clay stamps in total; some were better then others and some were just bad. I go into more detail in a later blog post. Next, we simply gained our own pieces of clay, which I started out by rolling out the clay completely into a clay slab or a complete flat out piece of clay before measuring out and cutting a piece of paper for the clay. What I did with the piece of paper is I place under the clay and then trimming out the additional piece. Finally, I trimmed a bit of the side of clay and glued the two sides together then I begin to work on the tripod bottom. Bending it in a triangle shape until it formed into three side and simply I combined them together. Leaving behind only a small circle in the middle that I fix with clay. The next thing I did is simply work on the design and texture of my tripod. I start out with grabbing a scale like piece of clay texture and then I press it against the central middle of the tripod. I think this texture was the less successful piece of my entire fish tripod because at times, the texture piece wouldn't properly press against the clay. Leaving behind a nearly invisible scales so I would press over and over, which leaves the scales to overcrowd themselves making the scales not very visible and realistic looking. The ending texture is interesting but not what I wanted, if I could I would have maybe made a clay stamp of scales or practice more with textured pieces before adding to my final piece. Next, I simply worked on the final details; creating fins and craving out lines, eyes, tail and lines, and finally, smoothing out the bottom and other piece of my fish. I would say that I think that the most successful piece of my fish was my fins because I shaped them pretty well, if I do say so myself, and bended them perfectly in order to grab it. These fins ended up being my handles on my fish tripod. I simply did the style from wanting to make a somewhat realistic fish and shaping two pieces of clay until they looked like fins then I craved out lines to look like the bones in fins, beneded the side in order to be picked up, and finally glued it in to the base of the tripod. I glued all the remaining pieces and then smooth out the bottom and I wait for it to dry out and heat out into a real tripod of a fish. Another thing that I have to say was pretty successful in my fish was making him have personality. I made a mistake in the eyes and the fins, placing them in different area from each other but in the end, it ended up looking my fish is simply dancing. Define Clay Slab: A flat piece of clay. Thank you for reading and hope you enjoyed!  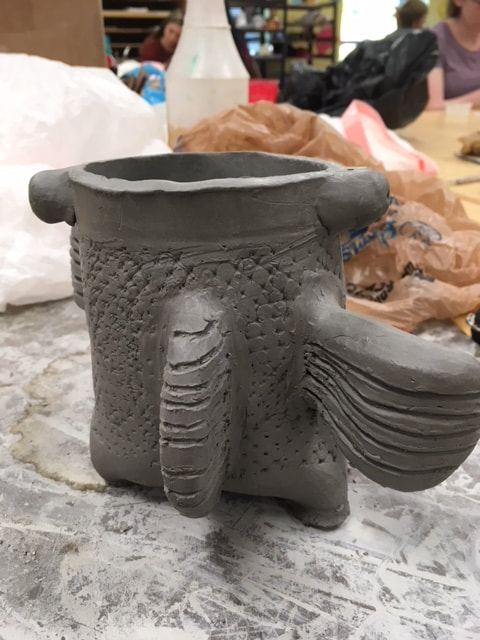 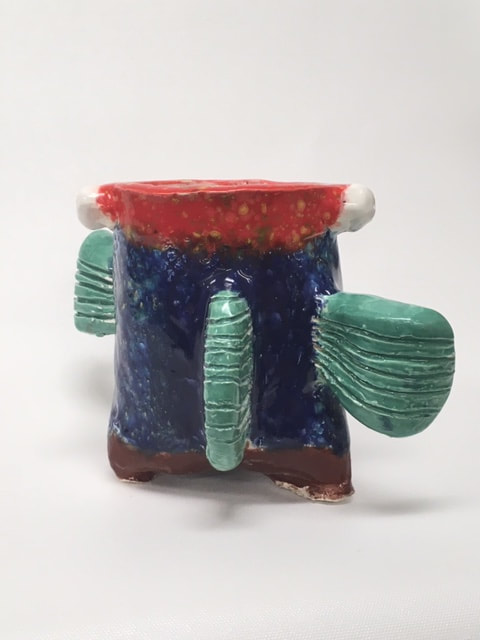 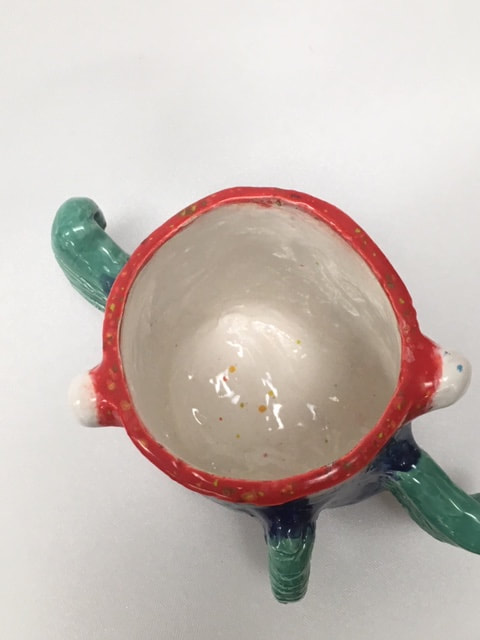  Hi and welcomed back! This blog post is going to be about Marta Klonowska, a polish artist. She was born in Warsaw in 1964 and now lives, works, in Dusseldorf. She studied at the Academy of Fine Arts in Wroclaw, Poland, during 1987 to 1989 and after that at the Dusseldorf Academy of Arts as a master student under artist A.R. Penck from 1989 until 1977. She has won awards such as 1999 "Artist in Residence" at the Cite International des Arts in Paris, France and the 2002 "Artist in Residence" at the Akerby Skulpturpark in Sweden. She was also a finalist to the 2006 Bombay Sapphire Prize in London, England. Most of her recent pieces can be found in Finnish Glass Museum in Riihimaki, Lorch and Seidel Galerie in Berlin, and Corning Museum of Glass in Corning, New York. The materials that she work with are mainly a metal skeleton before covering it with shattered colored glass in order to create beautiful and alluring sculptures as the ones below. She mainly crafts out animals as dogs, fish, and others, which is one of the main reason that I adore her work. Personally, I love animals with all my heart, especially dogs. Not only their personality but as well as their behavior and shape. How they move and their general appearance, which Klonowska has been able to capture perfectly. It looks to me that the sculptures are simply in motion or simply alive but I also enjoy the fact that she didn't just create sculpture of realistic animals. She created this realistic animals that appear to have come from a fairy tale or some magical world of color that just capture my eye and hold it there. Her work of colored animals of glass make me think of a fairy tales from a book or a story, the second thing that I love most in the world beside animals. I simply love her work because it combines the two things that I love most in the world, animals and stories, and it also is made out of glass, a material that I would never think to use. The way that she used the glass doesn't appear sharp but instead elegant like crystals from deep and dark alluring cave. In general, I simply just love her sculptures to death from her designs being of animals, the magical and fairy tale feel they have, and finally the elegant and crystal way that she transformed the shattered piece of colored of glass into. Thank you for reading, hoped you enjoyed! https://www.habatat.com/artist/130-marta-klonowska/ https://www.porta-polonica.de/en/node/231 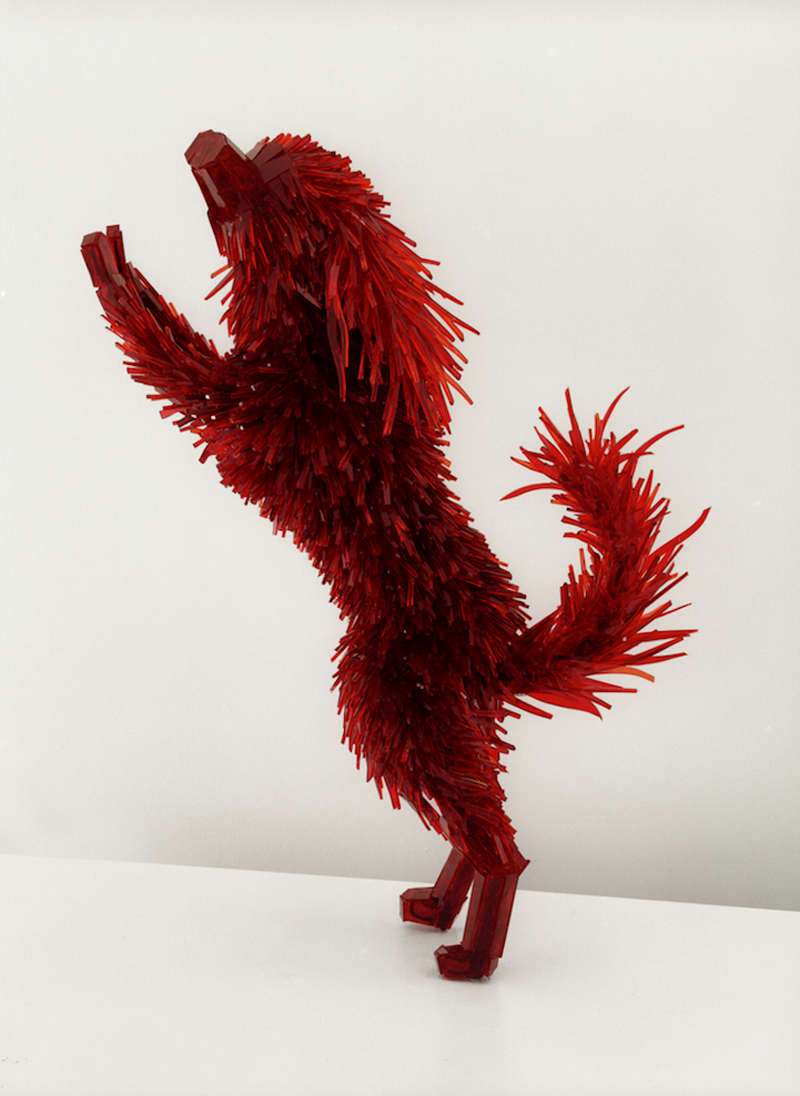  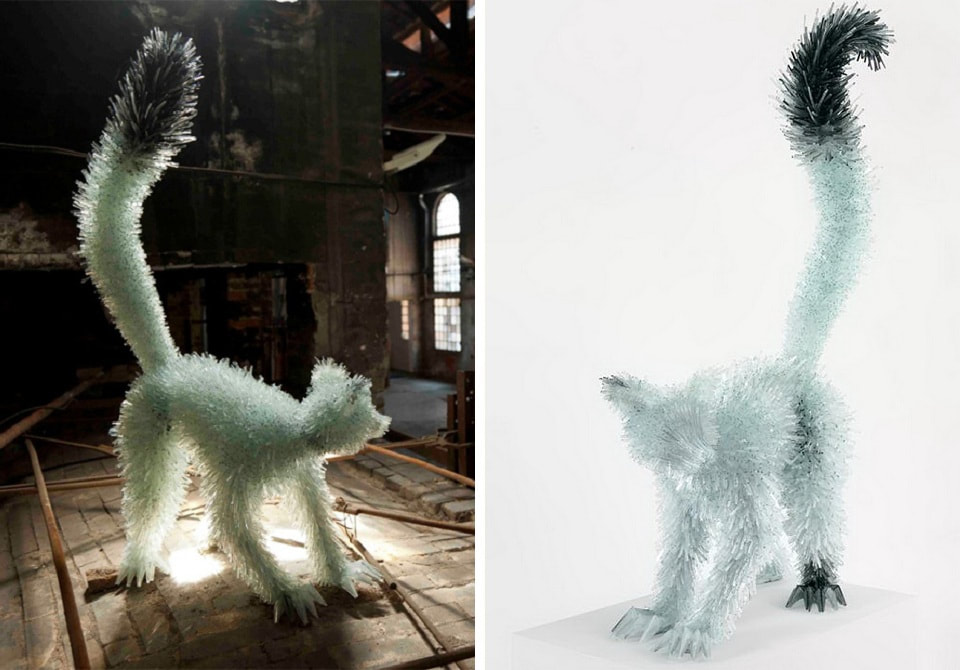 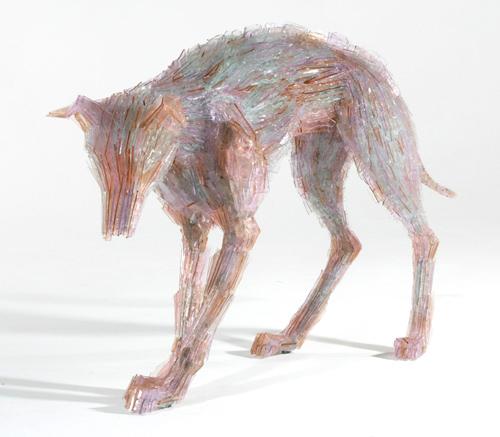 Hi and welcome back! This blog post is going to be about the five clay stamps that I made over the past two days. I made a total of five clay stamps, two balls, one long branch, one square, and a shape with a round base and a long handle. Made out of the texture techniques of random object, added relief, and carved relief. One of the stamps that I personally think will work out the best is the one with the long handle that I glued circles arounds it. I think this will work best due to the fact that the circles are built out of the clay that appear deeply craft out that when press against a slack of clay will leave a deep imprint. However, the one that I feel like is going to work the worst is the square. The reason why is because I craved it out, not very deeply but instead lightly meaning that I feel like it won't make a huge impact the clay very much. The stamps that was harder for me to make were the one with the long handle and square with the stripes. It was hard for me to craft out the one with the handle because it simply took a lot of time to perfectly shape it like the photo from the clay stamps directions. The base kept rising up and bending in the direction that i didn't want. The second one, the square, was hard due to the carving in general. I carved out the stripes with a needle tool and carving the line out was difficult because I kept messing up and making the tiny boxes too small and not wide enough. Even though, I took most time on it out of the other four, it still turn out as the worse, in my opinion. However, the style that I thought was the easier to make were the two balls because all I needed to do was around out two large blobs of clay. It was also easier to make due to the fact that all I have to do for one was to press the tap of a marker and the other, I simply had to carve out with the end of a sharp tool. This is all that I have to say for this week but thank you for reading and hoped you enjoyed! 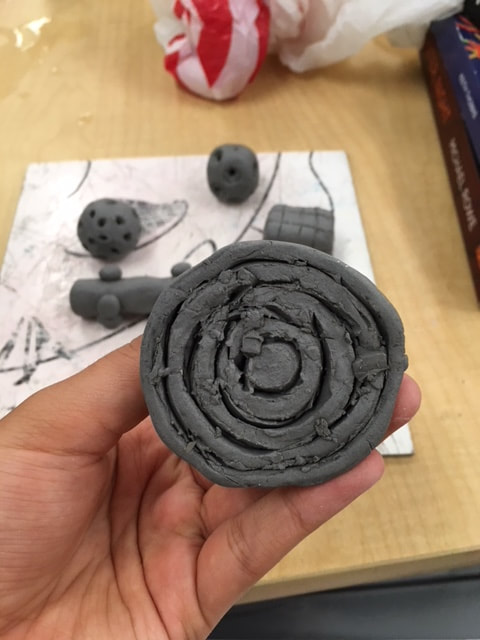 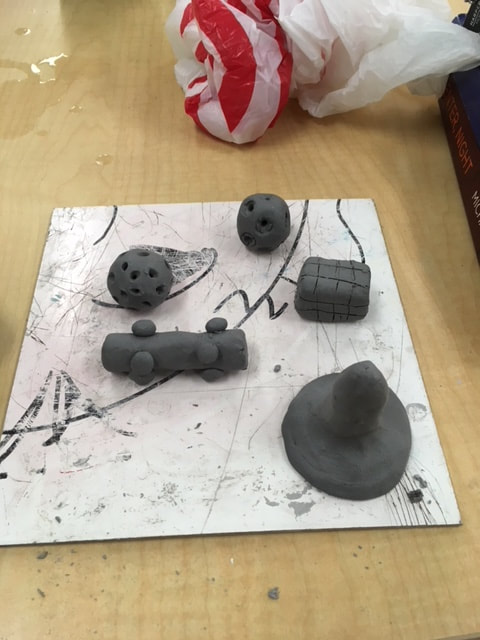 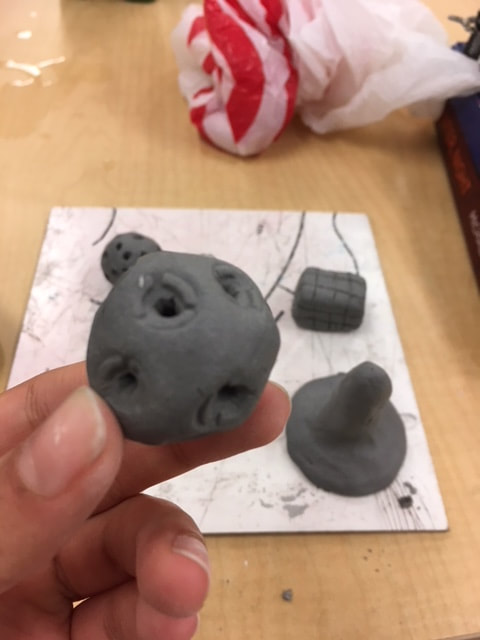 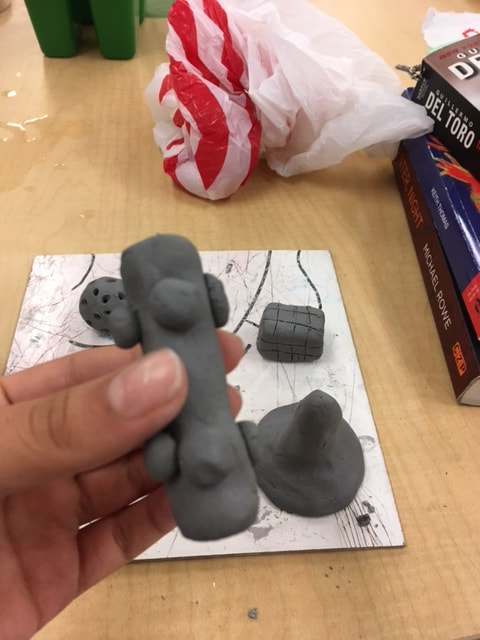 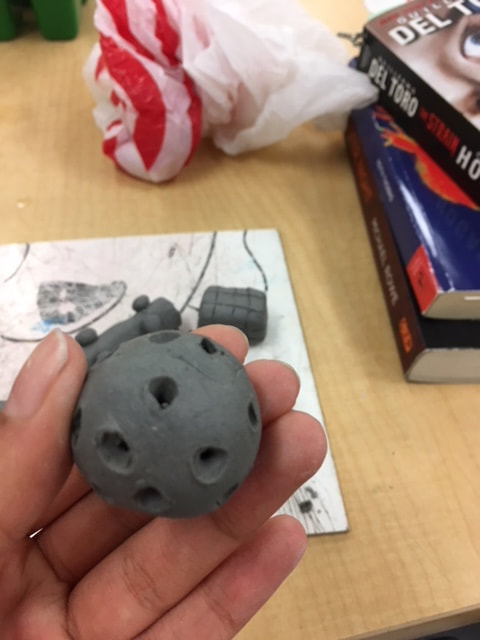 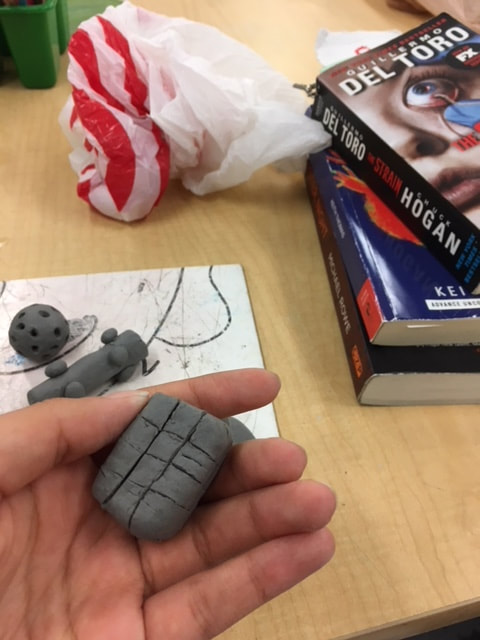 Hi, This is my first blog post ever and today I am going to talk about my experiences with practicing with clay stamps for the first time. We first practice with clay stamps from last years so that why we can get a feel to the stamps and have an idea on what work and what doesn't before we have to build on our. I used a total of four clay stamps; three of four worked perfectly for me today. My favorite was a ball covered in indented circles, it looked like a soccer ball. This stamp added perfect circle to my piece of clay that I could touch. The next one that worked perfectly was a piece of stamp that looked like a piece of coral from the darkest depth of the oceans. This piece added lines to my piece of clay that remained me of a branch of wood, covered in line from different piece of individual wood. The reason that I think that this two pieces worked so well was because they were indented well, I could feel each piece through my fingers and the stamp, itself, was perfectly to round around the clay. Whoever created these stamps pressed the pattern deeply into the stamps of clay. Also these stamps were easy to move around the clay, the first one was a ball so it was simple to round around the clay and get the indented in and the second one was a long piece that was also easy to round around the clay. The only that didn't work was a square piece covered in smaller square and it simply didn't show up on the piece of clay due to the pattern was too lightly pressed into the clay stamp, probably only once with the end of a tip as light and thin as a pencil. While the other stamps' pattern were more deeper pressed into the stamp of clay forcing the pattern to better appear on my own piece of clay. This practice will definitely impact my own clay stamps because now I know what work and what doesn't. Having a pattern deeply embedded into the stamps of clay will cause the pattern to show up against the clay better and also the stamp will have to be shaped in a way that is simply to roll around like a straight piece like a stick or a ball shaped. Thank you for reading and hoped you enjoyed. 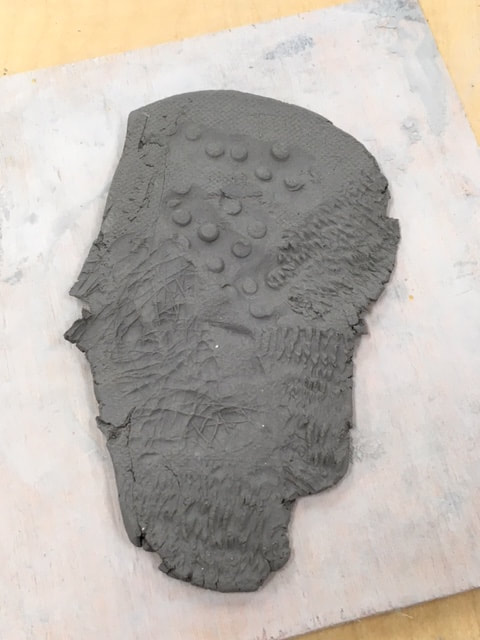 |
AuthorWrite something about yourself. No need to be fancy, just an overview. Archives
January 2019
Categories |
 RSS Feed
