|
1.Tools are a major focus in this class. Though many things can be completed by hand tools are often necessary. In creating artwork what type of tools have you used? In using these tools how did they help your work along? Explain their function and purpose. (Ex. Pottery Wheel, aviation snips, Clay rib) I used many tools throughout the semester but some of the most important to me at least are a needle tool, wire clay cutter, modeling tool and the pottery wheel. The needle tool is used for mainly adding details to the piece. You can create lines, dots, or any kind of design to a piece. A needle tool is also helpful when "gluing" two section of a piece with each other. You can use the needle tool to scratch lines then all you have to do is add water and hold it together for a few seconds. A wire clay cutter is mainly used when cutting out large bricks of clay into smaller pieces. This tool is used pretty much every day in a sculpture class since we are always using clay, we need to divide and give out pieces to every students. A modeling tool is made of wood and is mainly used to smooth out a slab of clay or a clay piece. This tool removes any harsh edges or section to the piece, making it perfect and smooth to the touch. The final tool is the pottery wheel. To be honest, I still haven't perfected the pottery wheel, still trying to learn. One way or another, it's a very important due to the fact that it's a completely different way of creating a piece then hand on. There would be marks where you had to "glue" the pieces together in the pottery wheel. The pottery wheel is also perfect for trimming any piece, removing any rough edges and getting everything simply perfect to the touch.  2. How has your knowledge and understanding of tools changed since the beginning of the semester? Talk about your growth of understanding. In the beginning of the semester, I was clueless to any uses of these tools. I had no idea what most of these tools were to begin with. I never even heard of a ribbon tool, modeling tool, a needle tool, a wooden rib, loop tool, and so many more. Even when Ms. Sudkamps explained the function of the tools, I understood the definitions of these tools but I didn't understand the true function of these tools. In the beginning, I didn't understand how important and helpful these tools truly are until later on in the semester when I actually began to use them for myself. I learned how helpful a needle tool can be when adding small details to a piece such as creating fur lines to my galaxy bat for a more realistic look or simply combining two parts of a piece together. I learned how a helpful a drilling tool can be when I used for my sgrafitto sunflower piece. I used small drilling for the center of my sunflowers, creating a realistic look, as well as creating single dots throughout the entire piece. Before the beginning of these semester, I barely know what these tools were, even that they existed. Now, I understand exactly what they are for because I used them over and over throughout this entire semester. I have memories of being saved by these tools. I can feel their impact against my pieces and like a movie playing, I see myself using these tools against the smooth and soft clay of my own piece each time that I pick me up from where it rests in my house.  3. Which project was your most successful? Describe the theme and or topic and the process you went through to complete the project. In my opinion, my most successful project was my sgraffito sunflower mug. The reason that I think that it was the most successful is mainly due to emotional reasoning. I had tried to do this piece before in my Art I class. I tried to create a sunflower mug out of clay and failed miserably but with this unit, my mug was reborn just like the Phoenix, rising from its own ashes. Not only that, I was finally able to gift my mom with the mug that she has always deserved. I decided on sunflowers due to the fact that they are my mom's favorite flowers and a coffee mug because my mom is always drinking coffee. I begin this project like any other, by grabbing a large slab of clay. Once I got it to the perfect length, I took out measured pieces of paper that I had cut out and cut exactly what I needed. Next step, I had to use a needle tool and cut out the corners of the slab of clay. In a second, I added water and "glued" my piece together then I begin to work on the bottom of my mug. All I did is grab a piece of a paper and cut out exactly what I needed before doing the same to my slab of clay and combining the mug to its bottom. Next step, I had to simply wait for my piece to become leather hard before I could even begin to curve out my design. Although, before I could curve anything, I needed to add black underglaze to my piece. Once it was ready, I begin to curve with a curving tool with a triangle end well after I traced three sunflowers throughout the mug from a drawing of a sunflower that I got off the internet. I curve out my sunflowers in a matter of days, taking my time, making sure that it was simply perfect. I also made sure to leave a space between each petals. Before I was done, I used drilling tools for the center of my flowers for a more realistic look and dots around the sunflowers. The final two steps were firing it and covering it in clear underglaze for a shiny and beautiful look to my mug. 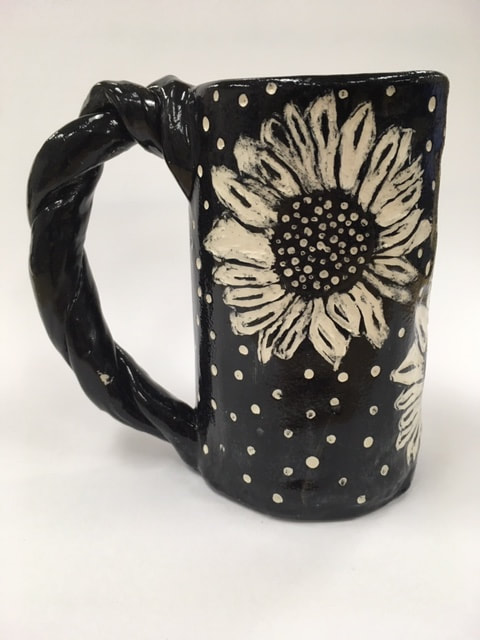 4. Which project was your least successful? Explain why you consider this work of art unsuccessful? If you were to create this project over, what changes would you make? I think my least successful piece was my first, the textured tripod cup. In this project, I made a tripod mug of a fish. Although, it was cute and the coloring was perfect, I did think that it looked like it was made by a ten year old. It was not very smooth, you could feel the rough edges throughout the entire piece to the point that I could cut myself. My piece's eyes was placed in different direction, giving it a cartoonist look . One of the fins was higher than the other but I simply told people that he was dancing. The worst part of the entire thing was that I didn't smooth it out properly meaning that you could where I added the eyes and fins. Instead of looking like that my fish was born of these pieces, it looked like it was added in last minute like a bad Frankenstein. All it was missing was the snitches through the entire thing. I do blame the fact that it was my project in this class and I hadn't worked with clay before except for once in Art I, which failed miserably. If I could redo the entire project, I would work on the small details. Removing any evidence that I added the pieces later on such as the eyes and the fins. Also I would make sure that the fins were placed in the same place and the same goes for the eyes. Instead of one higher than the other, I would have them perfectly placed. Also I would have color it over once again since that blue glaze fall against the green of the fins, it wasn't meant be there. Finally, I would have planned more my piece before actually creating; I would have went online and searched for examples of tripod mugs or pieces used to represent a fish. In general, I would like to recreate this piece now because now I finally understand what I am doing after months of practice.  5. Regardless of whether you liked or disliked a project, which one did you learn, grow, or developed the most from? Please explain. To be honest in order to answer this question, I have to talk about at least two pieces. The two pieces that I grow the most from was the textured tripod mug and the pit fire. The textured tripod mug due to the fact that it was the first project that I ever did involving clay. This project showed me exactly how clueless I was with anything involving clay. When doing this project, I asked a hundred of questions from the simplest thing to the hardest things. I had to ask how to how to combine two parts of a piece together. Even though, my piece, in my option, did failed, this was the piece that I learned the most from everything that I did throughout this semester. With this project, I learned from all the mistakes that I make from the misplaced eyes and fins to the rough and sharp corners. This was my worst piece and with this piece, I realized all my mistakes and promised myself that I would make these mistakes. I learned how to combine both of pieces together, smooth everything out, and how to use some of the tools such as the needle tools. I learned from the pit fire piece for the exact opposite reason. This was the first piece that worked or was simply successful to me. With these, I remember all the mistakes that I made with my last piece and simply did the opposite. I made sure to use a sponge to smooth everything out to the point of perfection as to not leave a rough sensation to the piece. I asked a million questions once again and made sure to follow each by the word. I perfection the technique of combining two parts of a piece together. Cut off the corner and scratch a hundred of lines with a needle tool before adding water. I used tools that I never thought of using before; I used a needle tool, a modeling tool, and an exo knife. I was finally able to make my piece look each section of the piece belonged to each other. The piece simply looked right and how I wanted. I think that the main reason that this piece helped me grow is because it showed me that I could do it, that I know what I was doing, mainly. Although, the piece wasn't perfect, it was enough for me to be confidence while my first piece, my fish, helped me by showing me just how much I needed to learn. One piece helped me by breaking me down while the other helped me by bringing me back up. 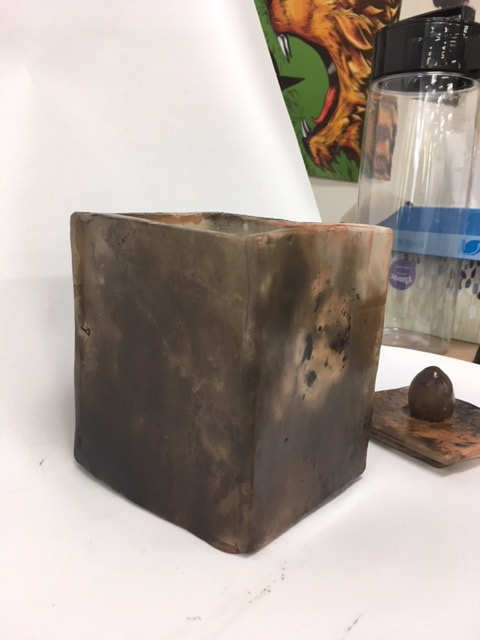 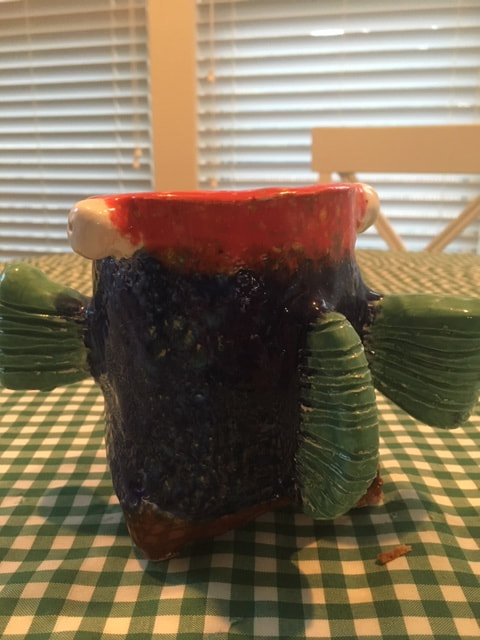 Thank you for reading
Hoped you enjoyed and thanks for everything, Ms. Sudkamp
0 Comments
Hi and welcome back!!!! This blog post is about the mosaic piece that I have been working on for the past things days. I originally had the idea for a illustrated Friday. The word was winter and at the time, I was finishing up my figurative piece and trying to come up with a idea for a mosaic. In a stroke of luck, I killed two birds with one stone; I came up with a idea for my illustrated Friday and for my mosaic. Also, I also love snowflakes so working with snowflake was simply perfect. In the end, I decided to design my piece the way I did because I wanted to do something different from the rest of my classmates. Everybody else was creating a mosaic with the main subject of their piece as well as the background so I decided to do something different. I decided to simply create a mosaic with the background and simply paint the snowflake. Also, to be honest, I was worried that I wouldn't be able to actually create the snowflake with broken piece of clay. I was worried that the pieces would bend or curve in the way that I needed to do so I simply decided to paint it instead. I thought the most difficult part of the piece was broken pieces for my background. This was the hardest part because I kept having to go back and forward to find the perfect piece for a blank space as well as having to break some piece to fit perfectly. I did find the look of the snowflake, itself, to be successful. This is done to the fact that I printed out a piece of paper with a drawing of a snowflake and simply trace it against the wooden board. If I could do this project again, I would plan out my pieces more. Instead of simply stealing from other people, I would have made my own from clay. One way or another, I truly enjoyed working this piece and I would create another mosaic if I have the chance. Thank you for reading Hoped you enjoyed!! 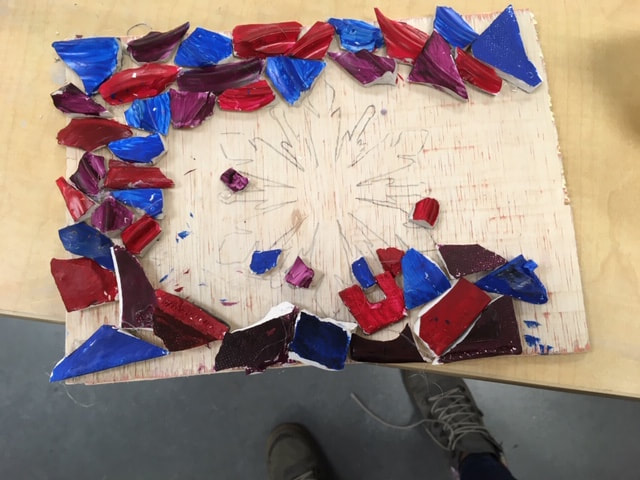 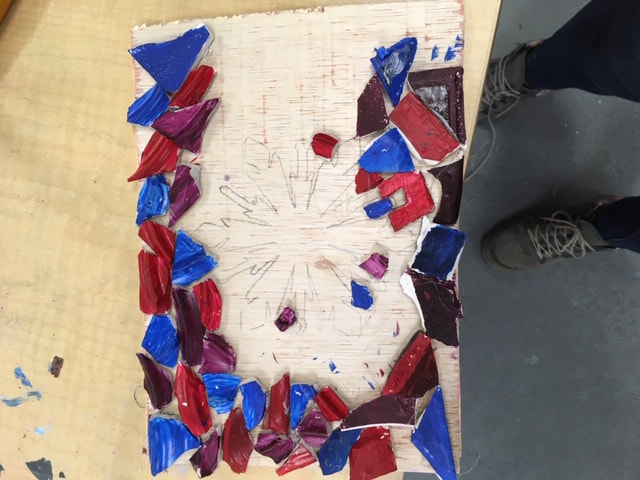 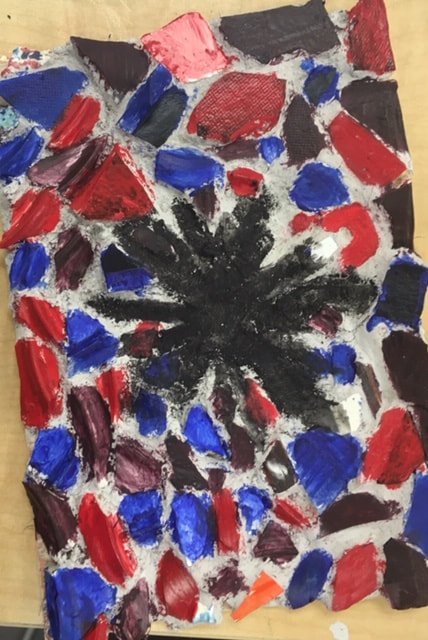 Hi and welcome back!! This week I am going to talk again about my sgraffito piece, a coffee mug craved in sunflowers and dots. I started this progress by stretching out a long piece of clay then taking out the measurements that I had beforehand and simply cutting it out. After a couple of failed attempts, I got it perfect. Next, I begin to glue the two ends of the clay together. I had to cut off the corners, scratch around the two areas and finally add a much of water as the glue. I had to hold the two end together for a couple of minutes. The next thing that I did is trace out a base for the bottom of my mug and glue it exactly how I did with the mug, itself. Once I had the mug built, I used a brush to smooth everything out and made it simply perfect then I simply had to wait. I had to wait until the mug was leather hard and once it was, I could paint it with black underglaze. I painted at least 4, maybe 5 times, to make sure that no strokes were visible against my mug. Once again, my mug had to dry and once it did, I begin to trace the sunflower pictures that I had printed beforehand from the internet. I traced three sunflowers around my mug. The tracing was done, I begin to carve with a carving tool and with that, my ordinary mug became a sgraffito. I traced the sunflower for about 2, 3, days before it was perfect. When I would trace the petals, I made sure to leave a line between each petals, providing a more realistic look to my piece. For a final touch, I used a drilling tool to create dots around the center as if it was a real sunflower. I also used a bigger drilling tool to add dots around the base of my mug, around the sunflowers. I finished off with covering a couple of smudged parts with black underglaze then I sent it to be fire. Once it came out, I coated in clear underglaze for shine and sent it to be fire once again. I though this entire project was really fun to do and I think the end results were simply beautiful from everyones that I seen from my classmates. I saw things from plates to mugs to vase to much more. The entire progress of sgraffito is simply beautiful to look at because the craving themselves leave this gentle and nearly perfect image. The progress of creating a piece of Sgraffito is simple so peaceful and calming to create; I could have spend hours craving out sunflowers around the base of my mug. The most successful part of my mug were simply the handler and the sunflowers themselves. I did the handler by copying a classmate, I created the handler by twisting two snake piece of clay together like it was a candy cane of clay. The handler ended up a little edgy but smooth just like I wanted it. The sunflowers, well, looked like flowers, which is exactly what I wanted from them and more then that, they looked like sunflowers; I couldn't have been happier. I created gentle and smooth sunflowers, they might not have been identical but they ended up pretty good if I do say so, myself. The only thing that I would change about my piece is I would have work more on the mug itself, curving it around the rim to look more curvy like a coffee mug and made it a less tall but other then that, I couldn't have been happier with my piece. Thank for you reading!! Hoped you enjoyed!!  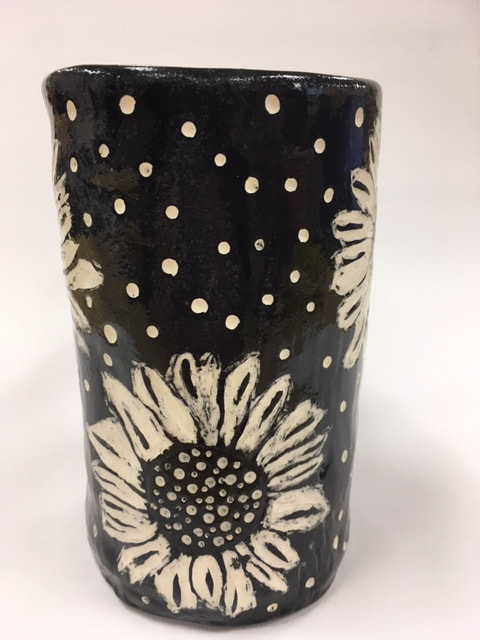 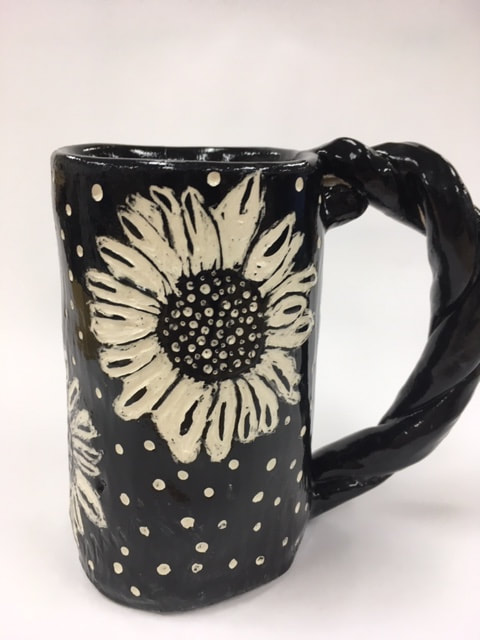 Hi and welcome back!! This blog post is going to be about my most recent project of working with Sgraffito. I was inspirited by a past project that I tried to do back to when I was in Art I. I was working with clay for the first time and I wanted to create a gift for my mom. So I decided on the two things she loves most in the world, coffee and sunflower. I made her a coffee mug with sunflower piece that I crafted by hand, the only thing that it didn't turn out so good. I gave up on that present for my mom until Sudkamp brought up the idea of Sgraffito and as a light bulb went off, I return to a past idea. I begin by figuring out measurements and stretching out a long and thin piece of clay. It took a couple of tries but I finally got it right in the end. Next, I pinned the two ends of the clay together by cutting off the edges and scratching out lines before dripping it with water. Just like glue, my piece became one. I made a circular bottom and added to the piece. I brushed out the piece in order to smooth it out and make it simply perfect. Once that was done, I simply had to wait until it was leather hard and then the fun come truly begin. The second my piece became dry, I grabbed black underglaze and painted the entire thing from bottom to top to inside to the base at least 4 times until it was as perfect as I could get it to. Beforehand, I printed out some pictures of sunflowers and simply traced against my piece 3 times and next came the step that truly made my piece a sgraffito. With a carving tool, I begin to trace my sunflower leaving behind a little line between each petals. It took me a couple of days to finish the entire thing and before I was done, I decided to add tiny little dots throughout my piece with a drilling tool. The final step is to fire my piece and check to see if it adds more black underglaze then coated it with clear underglaze for shine. Thank you for reading!! Hoped you enjoyed!!  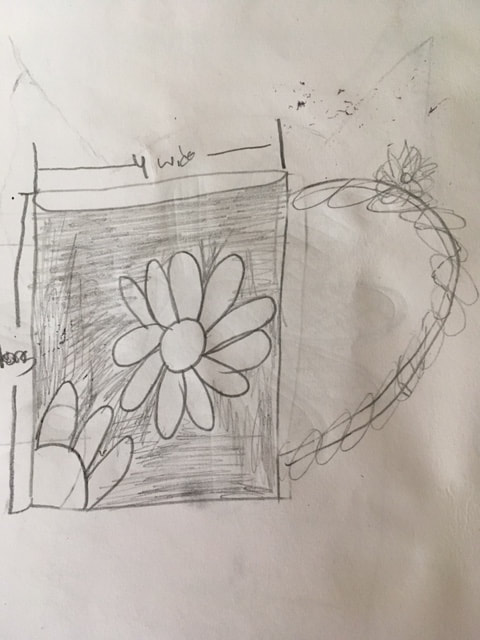 |
AuthorWrite something about yourself. No need to be fancy, just an overview. Archives
January 2019
Categories |
 RSS Feed
